Wednesday, September 30, 2015

18th century sewing kit or 'housewife' - September HSM Challenge 'Colour Challenge Brown'

For September's  Colour Challenge Brown challenge, I created an 18th century sewing kit or 'housewife' out of leftover silk scraps, with rose burgundy, blue & brown being the main colors! . 

First, the finished sewing kit / 'housewife':
Silk Sewing kit or 'housewife' by TheLadyDetalle

Silk 'housewife' w/ silk ribbon
An 18th century sewing kit has been in the plans for a long time, but I know so little about them. I've seen these sewing kits popping up at Fort Fred (where I picked up a small version a few years ago made of cotton/linen), and more recently someone made one & posted on LJ. So my mom is currently making a bunch of fabric books (a really cool alternative scrap-booking idea), and I asked her to save the scraps from the outer cover fabrics (one of which I gave her to use), and she gave them to me last weekend and so now I made an 18th century sewing kit or 'housewife' using fabric book scrap as a base.

The scrap was a quilted (low slub) silk dupioni in a rose burgundy, and was JUST too pretty to throw away, so based on my small reproduction 18th century sewing kit and a few images I've seen of like  ones, I decided to put one together, making it up as I went.
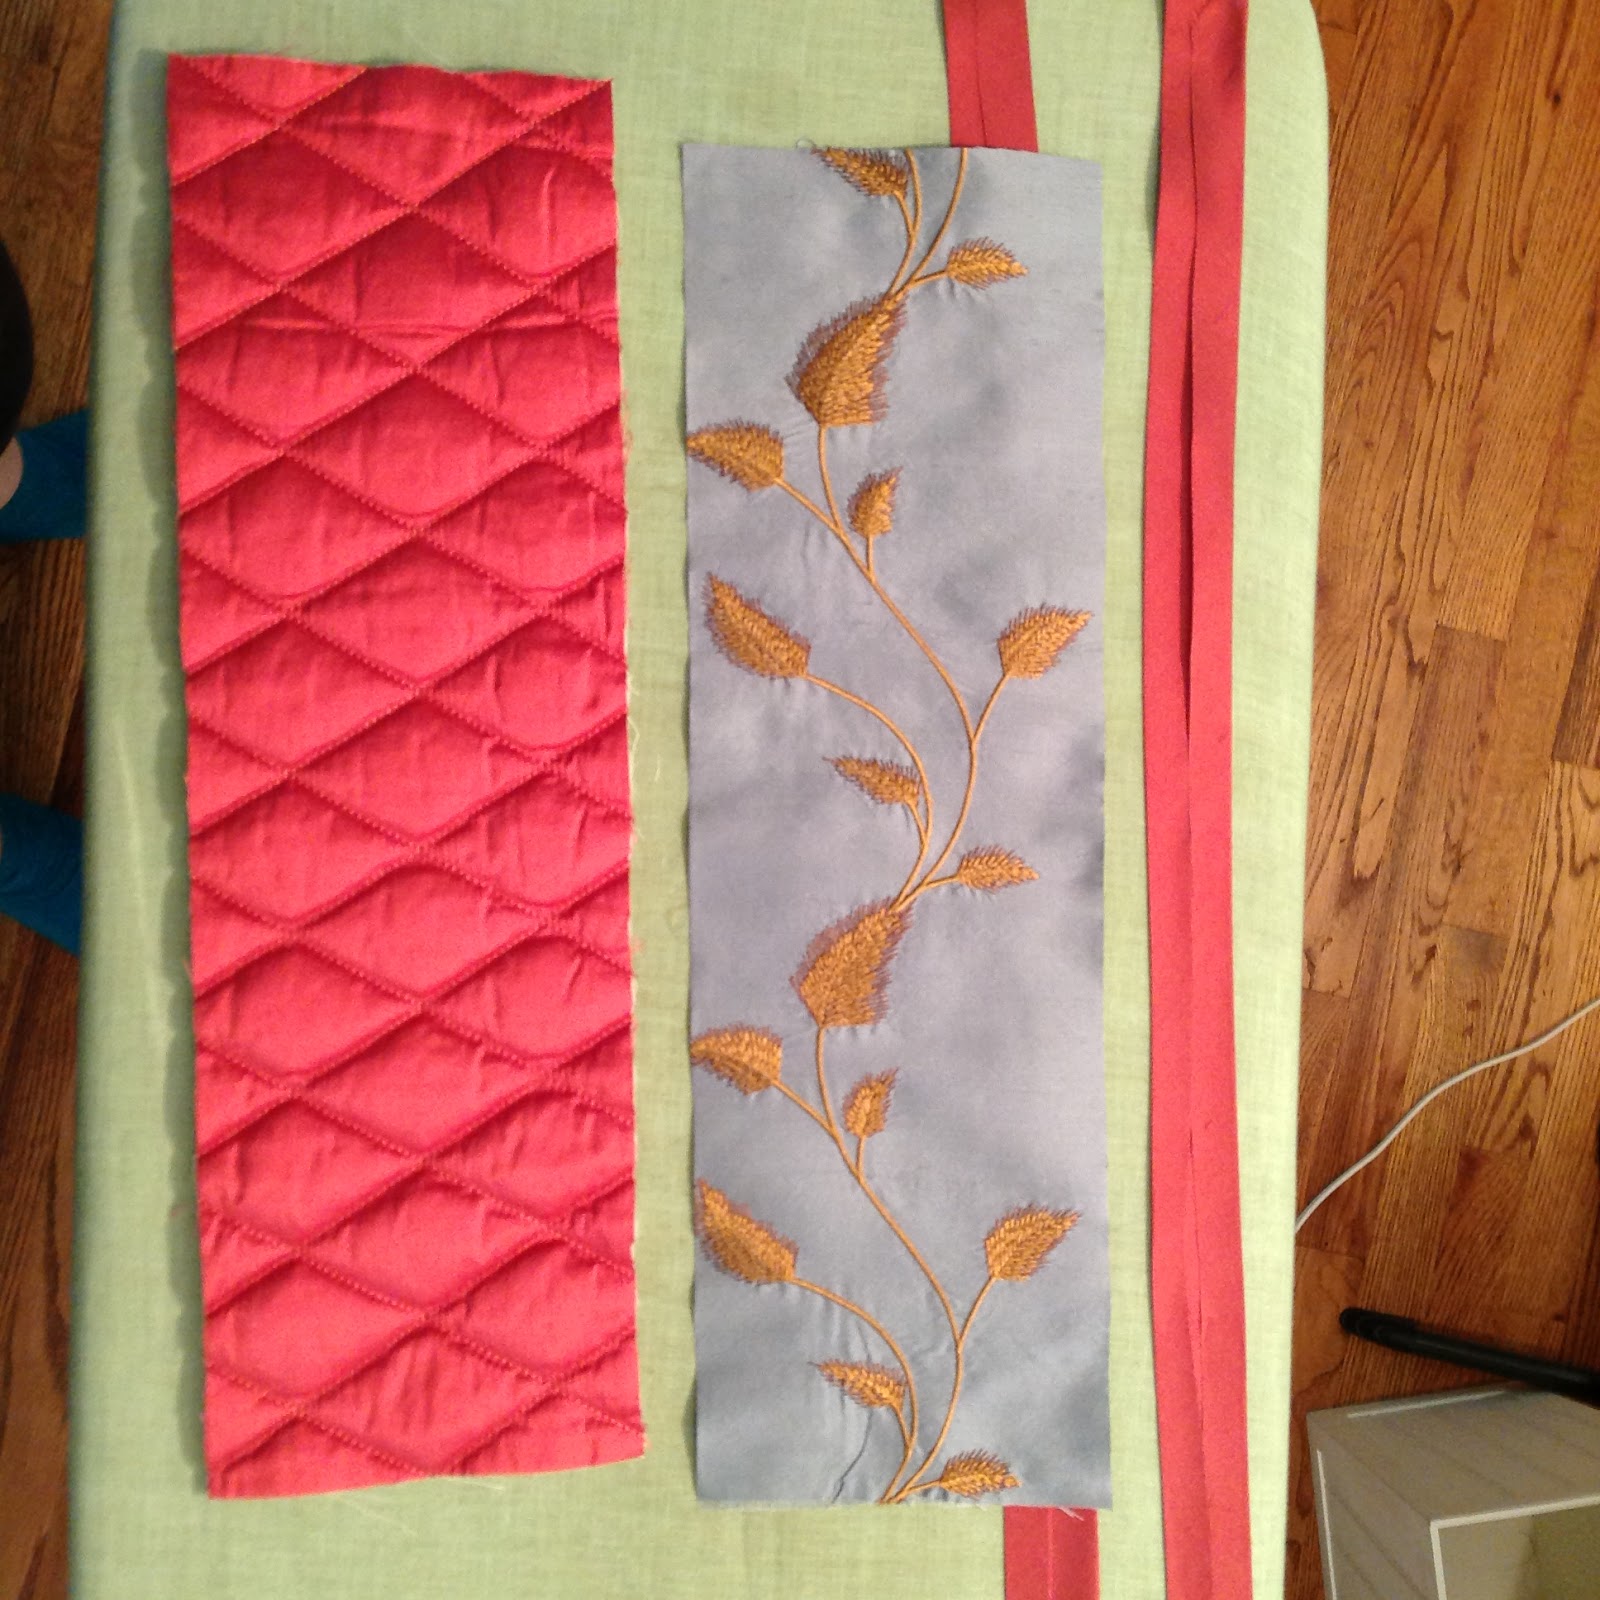
Cutting the silk dupioni

First, I dug in my leftovers bin, which is basically leftover fabric from finished projects, and came up with a few pieces to use.
The outside (fashion) of the sewing kit is the rose burgundy quilted silk scrap mentioned above, and the inside I lined with a leftover piece from a reproduction muff for sale in my etsy store, a blue silk dupioni with embroidered wheat (in brown silk).

This was a really quick little project, basically cutting out a piece that is 5 1/4" X 17" in the rose burgundy quilted silk and then the same in lining (blue embroidered wheat silk), pinning and hand sewing on the rose silk bias binding all around, in order to finish the main piece.
Pinning & sewing binding - lining side
Then I added all the various little pieces that make up the needle holder, a pocket, a band (to hold in thread) and more. It was a lot of fun and quick to put together, and I Google'd to get a few image ideas of what to include inside.

I also dug around for a very small piece of blush colored silk dupioni (leftover from my 18th century riding habit waistcoat) for a pocket, a few small scraps of coutil from my Regency stays (for needles), and some brown gold dupioni from my yard sale find silks for binding, as well as some silk ribbon. I also made bias binding for the fashion fabric/front/back of the sewing kit from a small amount of rose burgundy dupioni from my stash (silk sale earlier this year which matched almost perfectly, yay).

Adding the sewing kit pieces
A fun, quick little historical sewing project that incorporated the challenge color BROWN, used stash scraps and from which I learned a bit more about historical sewing kit/'housewives'.

Historical Sew Monthly SEPTEMBER challenge:


The Challenge: Colour Challenge Brown: it’s not the most exciting colour by modern standards, but brown has been one of the most common, and popular, colours throughout history. Make something brown.

An 18th century sewing kit or 'housewife' made of rose burgundy quilted silk dupioni, and lined with blue embroidered with brown wheat silk dupioni, with touches of brown gold & blush finishes.

Fabric: Small scrap of rose burgundy quilted silk dupioni (from mom), small scrap of blue embroidered with brown wheat silk dupioni (from a muff I made previously), bias binding from rose burgundy silk dupioni stash fabric, pocket from blush silk dupioni (from JoAnn's leftover from my late 18th century riding habit waistcoat), white coutil (from 96th District Fabrics leftover from my Regency stays), and some small pieces of brown gold silk dupioni (from yard sale find).

Pattern: No pattern. This came entirely from past experiences in looking/handling small reproduction versions and seeing images online. I guessed at the sizing and details, and used Google to confirm some general images of 'housewives.'

Year: 18th century - going for late 18th century

Notions: Silk ribbon & then small sewing accessories just to show how they fit

How historically accurate is it? It's a reproduction 18th century sewing kit ('housewife') out of close to period appropriate fabrics (silk dupioni is not quite period, but it's low slub quilted and embroidered dupioni, so hard to tell).

Hours to complete: about 4-5 hours total.

First worn: Not worn, will be taken with me and used when I re-enact sewing or want to bring along to an event and sew.

Total cost: Almost nothing. All stash (except the quilted scraps from my mom) and all small leftover pieces from other projects, so I felt very thrifty, which is I'm sure how they made theirs & felt also!
Silk 'housewife' by TheLadyDetalle
Next up is October - Sewing Secrets

Sewing on marabou feather trim - a mini tutorial

A few people have asked me about sewing on marabou feather boa trim...so I decided to do a quick little tutorial explaining how to work with this stuff, and hope that it is helpful!

I used marabou feather boa trim on the following projects: 18th century pink silk w/ white marabou hooded cape, 18th century black silk w/ black marabou hooded cape, my fluffy white modern hat, and most recently, my early 19th century (Regency) cream silk w/ white marabou pelerine.

18th C pink silk hooded cape 
19th C cream silk pelerine
Resources: All of the marabou feather boas I bought at my local JoAnn's or ordered from JoAnn's.com. Link to boas here (also I used sale coupons).

Also on the sidebar (near top) is a link to my Pinterest board of capes, cloaks, pelerines, mantles, and other examples of historical outerwear, many of which have marabou trim OR ermine or other furs.

There are different methods for sewing on marabou trim, and what I used was intended to very thoroughly secure the marabou to the cape/pelerine edges, and minimize the amount of feather shafts (the hard middle part of the feather) that stick up. I did this by securing the marabou every 1/8-1/4 inch instead of every 1/2 or 1 inch or so, which was laboriously and difficult, but ends with a lovely finished product!

Finding the SMOOTH side: Pick up the marabou feather boa and stroke it a few times in opposite directions, finding the smooth side (the side that strokes the feathers down versus standing up). The smooth side direction top will be your top edge. This is what you want to start with, to secure on your cape/cloak/etc. Keep in mind that you want the feathers to smooth DOWN, so if you are starting with the hood, find the middle of the hood at the top, and then start there and make sure the feather boa is smooth going down one side of the hood, then using a separate piece, start again on the other side of the middle ensuring that the feather boa is smooth going down the second side of the hood.

Marabou feather boa, SMOOTH side versus NON SMOOTH side:

SMOOTH side
NON SMOOTH side
The same holds true for the cape or pelerine edges, you want the marabou to lay smooth going down, so ensure that you start at the top and sew down the cape/cloak/peleriene edge, with the marabou smooth side going down (going down the vertical). Areas of the cape/cloak/pelerine that are horizontal can be smooth going either way, so I just continue the smooth direction already in process and keep going.

Sewing it down: Using a needle that has been double-threaded (I used Mettler's 100% cotton), First, you gently cut away the bit of rope at the end of the feather boa, leaving you with only feather shafts (use non-sewing scissors). Starting from the bottom (lining side) hide a thread knot underneath the edge of the bias binding, coming up slightly over the middle on the top edge (above the marabou).

Start your needle from below, hide knot
(View without flash)
Take your needle OVER the marabou (hard to see)
Then take your needle across the marabou below to enter your needle in just on the other side of the marabou trim (so as to cover the feather boa with your double thread and secure it) and come out the bottom side. Again, starting from the bottom, come up slightly over the middle of the top edge (above the marabou), then take your needle across the marabou, covering it with your double thread and through below to come out the bottom side. Repeat a few times in the same area to well secure the cut top end of the marabou boa. Then move on by repeating the above steps to sew down the marabou trim by securing it every 1/8-1/4 inch.

Continue with the above, sewing down all the marabou feather trim using double thread thickness (for securing) and hiding your knots as you go. It's fine if your stitches overlap each other a bit, it will make the marabou edge very secure.

Finishing: Once you have completely sewn on all the marabou trim (keeping in mind it should be SMOOTH vertically), you will now need to 're-fluff' the marabou! The double thread is now holding down (trapping) the fluffy marabou feather bits along the edge, and you will get a beautiful finished edge when you re-fluff it. Taking a needle or pin, hold the marabou up vertically (smooth or rough side doesn't matter).
Gently work out the fluffy feathers to release them from the (now) horizontal threads, picking out a small bit at a time, making sure not to pull too hard. If you pull too hard, the thin shafts of the feather fluff will break, so work gently and carefully.
Fluffing the marabou
See how the marabou is 'trapped' under the thread?

Fluffy marabou again!
Free as much of the marabou feather fluff as you can, and voila! You are DONE!!

Tips and tricks: The marabou feather fluffy bits MAY get caught up in your thread at times. If so, stop pulling and gently work at the area with your needle until your thread is able to be pulled through again. For me, it seemed to happen more with the white marabou boas then the black ones: the white ones were not quite as 'full' as the black ones, so this quality difference seemed to affect how easy it was to sew down without getting caught.

Note: if you are not looking to secure the marabou well and want to re-use it on other projects, you can sew down the marabou trim every 1/2 to 1 inch or more, and it may move around a bit but can be possibly removed later for re-use. I wanted my garments to last so choose the above securing method.

And there you go, I hope this mini tutorial was helpful!