Showing posts with label early 19th century. Show all posts

Saturday, July 16, 2016

Triangles, triangles, triangles

I wanted to share some of my earlier CoCo sewing progress. I did some bodice fixes (so it would lay flatter) and I'm adding black triangle trim to my early 19th century Regency cross over mustard yellow cotton gown.

The idea and inspiration for the triangle trim comes from here, here and here.
Here is the gown at the START (see how the bodice is a bit 'poufy' in the lower bust area? I wanted to fix that to lay properly over a pair of Regency stays):
Mustard yellow cotton Regency gown
For the trim, I created a channel trim by ironing in two sides (to form a channel), then fold one side down on itself, and then the other, iron down, and then cut off the lower edges with just a bit remaining, and voila, triangle to add! I made each triangle meticulously, and then tuck each into the binding trim (which I hand picked recently). Sew down the binding again to hold in the triangle, and then sew up and down each side of the triangle to finish.

A few in progress pics:
Detail of black triangle trim
Adding triangle to the skirt
I added triangles all the way around the skirt, then to the neckline and the sleeves, and now it's done and ready for CoCo!

Here's a picture of the FINISHED outfit:
Mustard cotton Cross over Regency gown
w/ mustard silk fichu
I'm really looking forward to the second wearing of this dress with my mustard silk fichu at CoCo!


Sunday, May 8, 2016

Costume College Gala - Bees, Bees, Bees

For Costume College's Gala event, I'm doing early 19th century court attire: an open robe and gown, I'm fondly terming 'Bees, bees, bees'!

Here's the fabric:
Silk brocade w/ Napoleonic Bees
I am making a Regency court robe (open robe) and a Regency court gown. I decided to follow Kat's advise and use Butterick #4890 to make the court robe (she made a gorgeous version of this at the end of last year for the Regency Baltimore Harbor weekend), and then I plan to use the La Mode Bagatelle gown pattern as a base to make the Regency court gown. I found a gorgeous silk bee fabric recently online that I'm using for the court robe, it was listed as silk shantung, but it's silk brocade: it ravels like crazy but it's very luxurious, I feel very spoiled and I'm loving working with it. It was way more than I ever pay for silk (I like super deals) especially for a non-wide 30" yard! But...it's really hard to find great silk Napoleonic bee fabric on super deal, so I just couldn't resist when I found this lovely Napoleonic bee burgundy silk brocade with gold bees: YUM!

I also have 4 yards of a gorgeous embroidered silk taffeta I picked up in the Fashion District about 5 years ago: cream with tiny red & cream flowers, that I am using for the court gown itself. It was always intended for a Regency so it's being used for its original purpose (win win!).
Fabric for the Regency court gown
I had a few days off recently so I was able to a decent bit of sewing in: so far I have the bee court robe all together, minus the final belt and the little gold trim I am planning for the edges. I have the court gown fabric laid out, but I don't have quite enough for my La Mode Bagatelle pattern pieces (I'm about a half yard short), so I'm going to have to be creative and figure out how to get it out of the fabric I have: a coordinating hidden back panel (but if I do, I can't really wear the court gown without the court robe), or add a different hem, another fabric for the top or just a bunch of piecing. Once I figure out what I want to do, I'll be full steam ahead on the court gown!

So far this is the progress on the bee court robe:
"Bees, bees, bees" Regency court robe
As soon as I figure out how best to do this, I'll start cutting out the court gown and sewing it together: it's so exciting to be so far along with my Gala outfit so early, which takes the stress off a bit and makes it more fun: I'll try to post a few in-progress pics. Eek, lots to do:

Here's a bit more about the idea formation:
I've been wanting to make a Regency court outfit, gown or robe with bee fabric ever since I began costuming. I have been on the lookout for great fabric for the last few years for this project, and occasionally pick up a bit of silk bee fabric at a sale price, but generally it's hard to find and expensive: so while I have acquired some and even made a bee muff a few years ago (and have some other bee fabric on hand to make up at some point, it wasn't quite what I was looking for, for this project though), until I recently found the PERFECT bee fabric for this plan, so I decided it was time to get this early 19th century court outfit going finally.

I'm going for something similar to this or this:

Here's a link to my Pinterest board for Napoleonic bees and also for court wear:

I'm an 'inspired by' rather than an exact copy costumer: the train on the original is too long for my super narrow fabric (there just wasn't enough of it: I COULD have gone a little longer and wider, but Kat made up the Butterick trained open robe already and it's gorgeous, so I knew I didn't need to go longer, plus now with the yards I have remaining, I should be able to get a spencer, muff, reticule & bonnet out of it hopefully! We'll see what I can get with careful cutting and piecing ;)).

I cut the fabric out for the open robe very carefully, and I'm going to try to get a spencer, bonnet, reticule (and maybe muff) out of the remaining yardage: I going to line it with mustard yellow silk taffeta. If I can get these done for CoCo, I will wear them with my yellow cross over gown.

I find it inspiring how often ideas can be YEARS in the making, but then they finally come together one day!


Wednesday, December 9, 2015

How To Create a late 18th century or 19th century reproduction silk muff ~ tutorial

How to create a reproduction late 18th century (or19th century) silk muff - muff cover & muff 'pillow' insides, mine made with 100% white goose down!
Reproduction embroidered silk dupioni 18th (or 19th) century muff
by TheLadyDetalle
Basically an 18th century silk muff like the reproduction brown & white silk taffeta one below (the first one I ever made, in early 2012, pictured) is made up of two pieces: 1) a muff cover (a tube shaped fashion fabric outside muff cover) that goes over 2) a muff pillow or muff insides (a rectangular shaped muff pillow that is filled with goose down, feathers, down alternative, wool, etc.).
Example silk taffeta muff by TheLadyDetalle
First, the HISTORY: I've long been intrigued by 18th & 19th century muffs, or hand warmers: a fashion accessory, whose purpose was also for keeping hands warm, were very popular throughout history. I've seen extant examples or portrait painting examples as early as the 14th & 15th centuries, but muffs were very popular during the Colonial & Regency periods of the late 18th (1770's-1790's) and early 19th (1800-1820's) centuries, and regained popularity again during the late 19th century (Victorian) era, and again earlier this century, in the 1920's-1950's.

Here is an extant example:
                                         Silk muff cover 1785-1810, Museum of Fine Arts Boston. 

And a link to my Pinterest board for Muffs of all types and period (up through Edwardian).

Muffs came in many different shapes & sizes, made of all different kinds of material, including fur, peacock feathers, goose feathers, wool, silk satin & silk taffeta, etc. The warm insides were comprised of wool, goose & duck down, feathers, and other material that would warm the hands (and was readily available during these eras). This particular muff is based on widely seen extant examples from the late 18th & early 19th centuries, comprised of silk taffeta, silk satin ribbon and 100% white goose down, for wonderful hand warming!

I first became enthralled by the idea of 100% white goose down,when I came across extant examples of muffs from museums, that contained down or a down feather blend. Then I found an extant example of late 19th century muff in an antique store: the black silk taffeta was shot, and peeping through was a lovely, luxurious white & grey goose down & feather blend! I was hooked from there!

Down is actually the soft cluster that comes from underneath a goose, and contains no hard quills like feathers do. I spent ages searching until I found a reputable down supplier, spent time vetting the company & talking to them to learn about down, and then off I went on my first down adventure!
Luxurious 100% white goose down
Now, the HOW TO, first up MUFF COVER:

You'll need one piece of fashion fabric for the outside, muff cover, 16" X 20" ~ I suggest a high quality silk taffeta (if you have a thin silk taffeta, you may want to double the fabric together in two layers), but you can also use silk dupioni, silk satin, silk velvet, cotton velvet, wool, cotton, etc.

You'll also need about 1 1/2-2 yards of ribbon, anywhere from 1/2"-1 1/2" wide (I use 1" silk satin) for the two side ties, and if you want to trim the muff, you'll need additional ribbon (or self fabric) for that, approximately 3 yards of ribbon for pleated trim that goes around the muff cover 2 times.

You'll need two pieces of non-fashion fabric for the inside, muff pillow, 12" X 20" ~ I suggest a fine, very tight weave natural fabric with some satin/sheen, like a fine pima cotton or sateen. Note that down or feathers will push through the fabric if the weave is too loose, so getting a very tight weave fabric is very important.

1) With the muff cover fashion fabric, find the wrong side of the fabric and fold over the ends of the 2 short sides two times each, first 1/4" then 1/2" creating a finished hem. Iron, then sew hem in place (hand or machine).

 2) Once the short side hem is in place, fold over the ends of the 2 long sides, two times each, first 1/4" then 1/2", creating a finished hem channel (where you will run your ribbon SIDE ties through later). Iron, then sew the hem channel in place, making sure to stitch along the TOP edge of the hem channel only: be sure to sew as close to the edge as possible, to leave plenty of room in the hem channel for your ribbon later. 

3) Insert a 28-30" long ribbon tie into one of the hem channels, pulling through until it comes out both sides about 3-4". Repeat for the second side. Tip*: I like to add an extra inch or two to the ribbon ties, so that I can pull them through quickly and easily with a round-ball-end bodkin (or alternately, you can use a safety pin and work it through by hand), so that when the ribbon is through, you can simply snip off the end or any uneven bits to 'finish' the ribbon SIDE ties.
Silk muff in progress - laying out the ribbon trim
4) Optional trim: if you plan to trim your muff cover, now is the best time! For the white, pleated trim above: starting about 4" from the hem channel edge, pleat & sew on silk ribbon, going from one side to the other, following the hem channels. Repeat for the opposite side.

5) Match right sides together of short sides, and sew a seam, being sure to catch all trim ends and the like INSIDE your finished seam. I suggest a 3/8-1/2" seam.  Iron seam open and turn muff cover inside out.

6) Creating the finished muff: Insert muff pillow insides, drawing up one side using the two ribbon ties, until a big enough opening for your hand to go in and out smoothly, then tie a bow with the ribbon ends. Repeat for the opposite side. Voila, a completed 18th century reproduction silk muff!

The finished muff should be approximately 8 1/2" X 13" for the muff cover (tube shape) and approximately 11" by 19" for the muff pillow insides.

HOW TO, MUFF INSIDES:

The muff insides are basically a pillow made of tight weave fabric, then filled with 100% white goose down, down alternative, cotton batting, wool, feathers, etc.
Luxurious 100% white goose down pillow by TheLadyDetalle
1) Measure and cut two 12” X 20” piece of cotton (high quality, tight weave pima cotton is ideal)

2) Place the two wrong sides facing together and pin all edges, leaving a 3-4 inch opening. 

3) Sew a ½” seam allowance along the whole side

4) Clip corners to remove excess fabric, but leave seam intact – turn inside out and push corners out, creating a pillow to fill.

5) Fill pillow thru the 3-4” opening with white goose down, goose down/feather blend, polyester fill or bamboo/polyester blend until sufficiently filled, light to medium firmness not stuffed (remember the pillow will be folded up on itself, so will end up being plenty ‘full.’

6) Pin 3-4” opening closed, folding back finished edges to create a finished edge.  Roll up pillow and test inside muff cover for thickness (do this BEFORE sewing together the opening, in case you need to add more stuffing or take some out). 

7) Sew 3-4” opening closed.  Optional – match 12” sides together, right sides together and sew ¼” or less seam allowance, to create a cylindrical pillow.  Note: this is not necessary to complete the muff insides, but is optional.  Insert muff insides into silk taffeta muff cover.  
Luxurious 100% white goose down muff insides!
Here's the link to my Etsy store 'TheLadyDetalle', if you are interested in purchasing finished muff pillows insides filled with 100% white goose down, down alternative, finished silk muffs, and more!

I also have a muff pattern instructions available (digital download or physical pattern) available in my Etsy store.

I hope you enjoyed this little blog 'tutorial' on how to make your own 18th (or 19th) century reproduction muffs!!
TheLadyDetalle with late 18th century reproduction muff and hooded cape
This tutorial is also the muff class I taught at Dress U in Philadelphia in 2012 & again in 2013!  Happy Sewing!

Saturday, November 28, 2015

Sense & Sensibility Regency Apron - November HSM Challenge 'Silver Screen'

November – Silver Screen: Be inspired by period fashions as shown onscreen (film or TV), and recreate your favourite historical costume as a historically accurate period piece.

For November's  Silver Screen challenge, I created an early 19th century or Regency apron. 

For many years I have been a fan of Sense & Sensibility (Emma Thompson's version began it all), and have long planned to make this practical and useful garment: I decided to use this month's Silver Screen challenge as an opportunity to make it happen finally! This was a quick and easy project, where I turned a curtain panel into a Regency apron that ties around the waist (at the back) and the top part is pinned up in two places. 

First, the finished apron:
Regency cotton apron by TheLadyDetalle
The apron is pictured over my 'Strawberry Picking' dress. The apron fits around the waist (high Regency waist) and ties at the back with twill tape ties. The top of the apron pins onto the bodice. 

First, here is my original inspiration picture from Emma Thompson's 'Sense & Sensibility.' 

I took a curtain panel that my mom gave me, cut it down to the size and shape I wanted, pressed and pinned seam allowances, hand sewed the side seams, (left the bottom seam as is), ironed and pinned the top part together, hand sewed the seams, pressed everything open. Then I pinned and sewed the top portion of the apron onto the bottom (finding the middles first), then hand sewed thin twill tape ties on, securing it all the way across, then it was done! 

Historical Sew Monthly NOVEMBER challenge:


The Challenge: Silver Screen: Be inspired by period fashions as shown onscreen (film or TV), and recreate your favourite historical costume as a historically accurate period piece.

An early 19th century Regency apron inspired by 'Sense & Sensibility' and the apron worn by Emma Thompson. 

Fabric: a curtain panel given to me by my Mom, who had been given the curtain panel from someone else. 100% white embroidered cotton.

Pattern: None: I estimated what the 'Sense & Sensibility' movie apron size and style that Emma Thompson wore on screen would be and then created it.

Year: About 1800

Notions: A bit of white twill tape for the ties.

How historically accurate is it? Pretty good I think.

Hours to complete: About an hour to figure out the size/shape, cut it down and pin it. Then 2+ hours to hand sew the seam allowances, sew the top together, sew the top and bottom together and sew on the twill ties.

First worn: Not yet! No specific outing in mind yet, but my idea for a future 'Regency strawberry picking' outing would be a good outing for this!

Total cost: Nothing. Curtain panel was a gift, thread is thread, and the twill tape was bought long ago. So all gifted/stash, so this Silver Screen challenge cost nothing!

I love how quickly it all came together, I can't believe it took me this long to make one, when it was so quick and easy!


Top portion of my Regency apron
Next up is December - Re-Do

Sunday, November 22, 2015

Regency Pumpkin Tea shoes - painting my American Duchess 'Pemberley' shoes mini tutorial

Earlier this year (mid summer) I painted my American Duchess 'Pemberley' Regency flats, and while I plan on adding more to these before they are 'final', I wanted to share a bit about the progress:

The In-progress shoes:
The 'finished' painted shoes!
I decided to be a bit practical and choose to make these shoes for an event that I always have every year: my Regency Pumpkin Tea in November!

So I read through American Duchess shoe painting tutorial here, ordered my supplies (leather paint from AmericanDuchess.com and also from Amazon.com, and petersham ribbon from The Sewing Place), as well as a pair of imperfect 'Pemberley' shoes on sale, and got to work. I had originally planned to make these as a second part to my July HSM Accessorize challenge this summer, but I ran out of time in July to get these done, and also opted not to make shoes for my late 1790's open gown, but instead to make them for Pumpkin Tea. I went all crazy mixing up and painting them with a muted, autumn-y shade of ORANGE, yay!

First, I cleaned my shoes with leather cleaner/preparer (to remove factory finish following American Duchess tutorial), lightly wiping them with paper towel.
Imperfect American Duchess 'Pemberley' shoes - ready to paint
I used blue painters tape to protect the leather bottoms from paint.
Taping up the bottom first
Taping the Inside of the shoes
Then I painted on the first, light layer of paint, a custom orange color I mixed: the first coat ended up being very light indeed!
Painting the first layer
Once I moved on to the second, third, fourth, fifth, and on until the seventh coat, when it finally looked solid and pretty (and you could no longer see the shoe underneath) - making sure to allow enough time for the shoes to dry for a few minutes in between paint coats - probably could let each coat  dry even longer and ended up with less coats for overall coverage, but I wanted to get going with it, lol.

In progress painting
I ended up mixing a custom autumn based orange using: orange, mustard, brown and burgundy.

In future, I'm planning on adding some petersham ribbon trim, and also a protective coat, so I'll post more when they are complete:

I'm really excited about the somewhat finished shoes: I wore them this past Saturday for the 9th Annual Pumpkin Tea, and I loved the way they went with my outfit!

Sunday, October 11, 2015

Regency Harbor Day - historical ships & fun!

Our friends Judy & Kat hosted a Regency Harbor Day in Baltimore on Saturday, including a trip to historical Naval ship U.S.S. Constellation (at the Baltimore Inner Harbor), and then dinner at The Belvidere's historical 'Owl Bar,' which was really neat looking decor, very eclectic and cool: and the food was yum!

I loved that my honey joins in, even when he needs a break from the costuming: he was dressed for Inner Harbor but wanted a break in the evening, and he still looks so handsome in his jeans!
My HB & I
The ship was just really enjoyable. I toured it long, long ago in my growing up years but it was like seeing it new again. We sat on benches in the captain's cabin, and planned a candlelit Regency dinner there at the table for 10! Too bad that's never going to happen, lol.
U.S.S. Constellation in Baltimore
Inside the Captain's cabin

U.S.S. Constellation - The tall ship touring group
Judy & Kat
My HB ringing the ship's bell!
At one point they shot the cannon, which was awesome, and then my HB had a good time ringing the ship's bell.

I also 'won' a few costuming awards from Kat, including the very special 'Marabou' award, which I was super excited about :)...I also won an "Elegance" award (not pictured).
Costuming awards
Austenland modern technology award
Later that evening, we met with some more friends at the 'Owl Bar', for delicious food and good company. I was so excited to sew and wear my new Regency pelerine for the evening, and it was so warm and fun to wear!
Marabou fun - photo by Kat
Gloria & I - photo courtesy of Gloria
Group shot at the Belvidere
Group shenanigans at The Belvidere
All my photos can be found here.

Saturday, August 1, 2015

Early 19th Century Painted Silk Fan - July HSM Challenge - Accessorize


For July's Accessorize challenge, I created an early 19th century painted silk fan, and finished it last night, just in the nick of time!

First, the finished fan:
Early 19th century painted silk wood fan by TheLadyDetalle
Early 19th century painted silk wood fan back by TheLadyDetalle
For July's HSM 'Accessorize' challenge, I decided to make some period appropriate accessories to go with my late 1790's open robe gown for the upcoming Jane Austen Ball!

I started by doing a lot of research on fans of the period, beginning with late 18th century and going all the way into the early to mid 19th century, to try to get an idea of the timeline and development of the fan and fan use, the materials they used, the changes in style, etc. I also looked into the regional differences a bit, but focused my research mainly on English & French fans of the early 19th century, although I also paid attention to fans that would have been imported at the time (China, India). I was really inspired by the many unique & beautiful fans that are out there, there was so much inspiration to choose from!

My finished fan is made using a vintage fan (as the wood base) from Spain, silk fabric and paint.

There were SO many lovely fans to use as inspiration, so I created a Pinterest board just for my fan research here, and ended up just painting the fan just from creativity in my head after looking at all the inspiration, as I'm sure other amateurs would have done at this time.

I also recalled the beautiful fans that I had seen for sale at times on InTheLongRun on Etsy, and also checked out InTheLongRun's fan blog post for ideas on what type of glue to use (GemTac). Also if there were any special tips or techniques to be aware of. I used wood instead of plastic, so I was experimenting on if the glue would work the same, but great inspiration there.

Here is my original fan:
Vintage fan - (Spain)
Here are a few in-progress pics of making the fan:
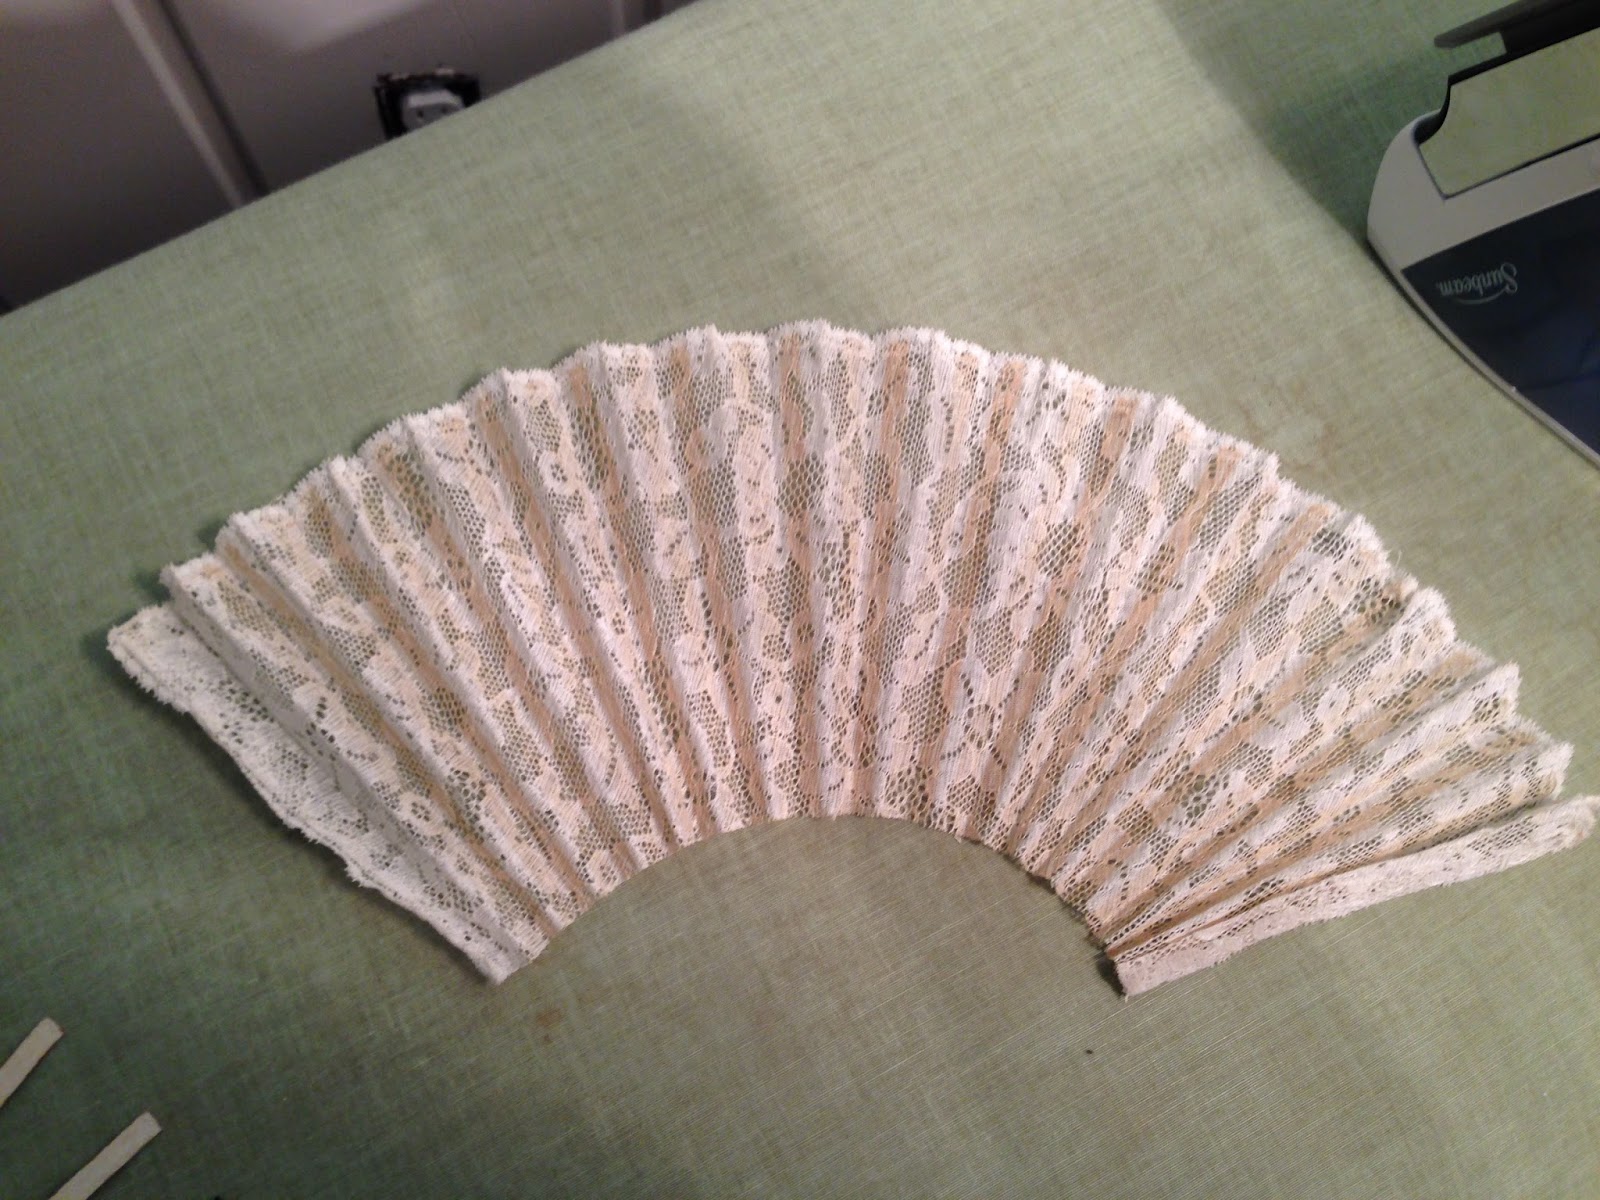
First, I very, very gently removed the old fabric lace from the wooden fan slats, being careful not to break them! If I broke them, I would be in trouble. Luckily the vintage glue made it relatively ok to remove the old lace.
Vintage fan - wooden slats with old lace removed
Vintage fan old lace after removal
Top is new silk, right is old lace and left is fan slat pattern
Gluing the silk taffeta to the wood slats
Finished silk fan - ready to paint
And here is the link to the blog tutorial I did on how I re-created this fan:

Historical Sew Monthly JULY challenge:


The Challenge: Accessorize - The final touch of the right accessory creates the perfect period look.  Bring an outfit together by creating an accessory to go with your historical wardrobe.

For this challenge, I decided to tackle my first ever reproduction fan! For over a decade now, I have wanted to create a fan, especially when the opportunity presents to 'rescue' an antique or vintage fan that is pretty much destroyed (but the fan slats are still in good shape - I have a few of those: we'll see if I can bear to use these in salvage even unusable, in original condition they are still SO beautiful). I've been planning this one for over a decade, and I'm finally taking the time to research and do it!

Fabric: Silk taffeta

Pattern: The 'pattern' was made by taking apart a vintage fan and using the original fabric for the mock-up of the new/fashion fabric. Also utilized the basic fan tutorial by InTheLongRun for tips & tricks.

Year: Early 19th Century

Notions: Acrylic paints, Gem Tac glue

How historically accurate is it? Not perfect, but I would say it's similar to what an amateur would have painted for themselves at the time. The wooden fan base is just like what they would have had and created at the time, and the fabric and design, size & shape are period appropriate for early 19th century fans.

Hours to complete: Total - 1/2 hour remove old fabric, 4 hours to cut the silk, glue it all and paint it.

First worn: Will be used at the upcoming Jane Austen Ball at Gadsby's Tavern on August 8th!

Total cost: the fan was $12 on Ebay. The silk taffeta came from the stash.

Next up is August - Heirlooms and Heritage