How to modify a vintage fan to make an early 19th century fan reproduction: a painted silk fan mini tutorial. Yesterday I finished my painted silk fan, and wanted to share a bit about how I made it!
First, here is what my finished fan looks like:
 |
| Early 19th Century Painted Silk Wood fan by TheLadyDetalle |
I did a lot of fan research first, and created a Pinterest board for this research, before getting started with this project. I mainly focused on mid 18th to mid 19th century fans, from France, England (& even China), looking at the type of materials used (wood, bone) and fabric used (lace, silk, cotton), many that were meticulously hand painted with little scenes or a portrait, with little metallic spangles or other decorative bits. I was really inspired by the many unique & beautiful fans that are out there, there was so much inspiration to choose from!
I also checked out
InTheLongRun's fan blog post for ideas on what type of glue to use (GemTac). Also
if there were any special tips or techniques to be aware of. I used wood instead of plastic, so I was experimenting on if the glue would work the same, but great inspiration there.
One day I'd like to paint a fancy paper fan, use real antique fan slats in a creation, and hand painting tiny little things, although first up is my 'test' run using a vintage fan. that I finished last night!
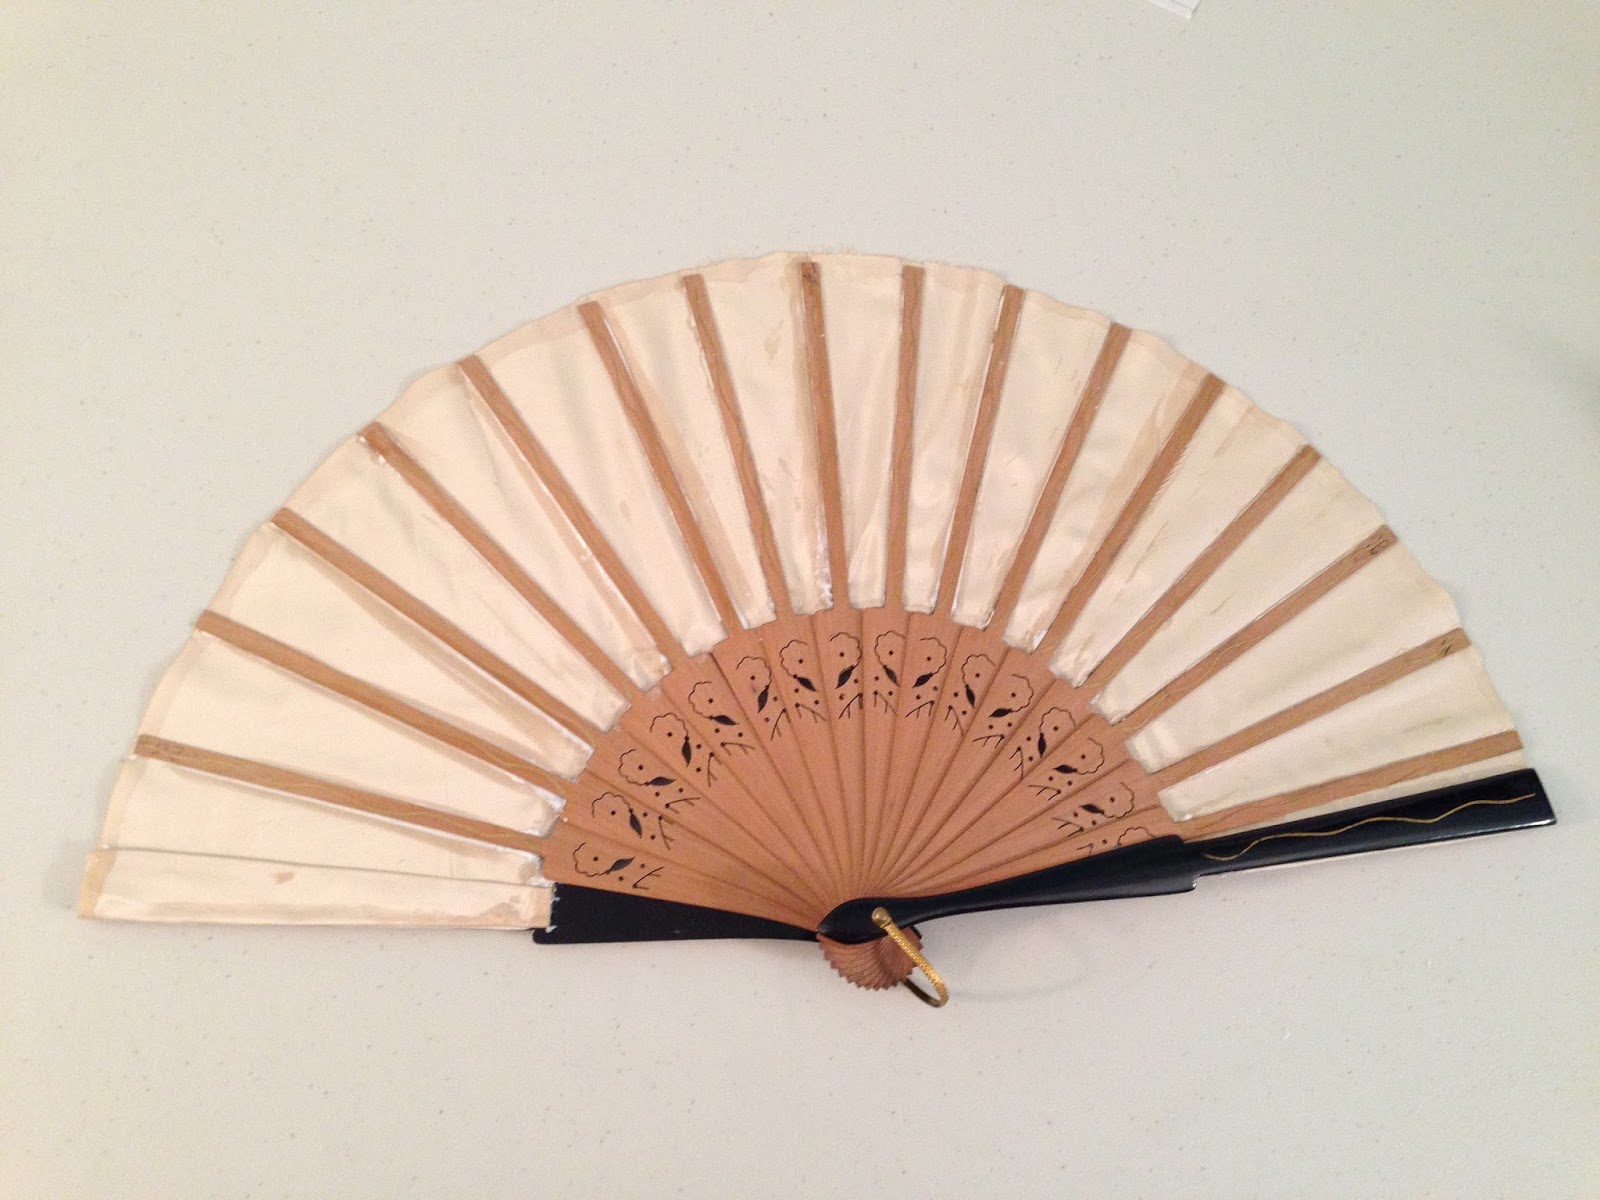
Here is what my vintage fan looked like: I acquired this on Ebay for about $12.
 |
| Vintage fan - (Madrid, Spain - my guess, 1950's? |
 |
| Vintage fan - back |
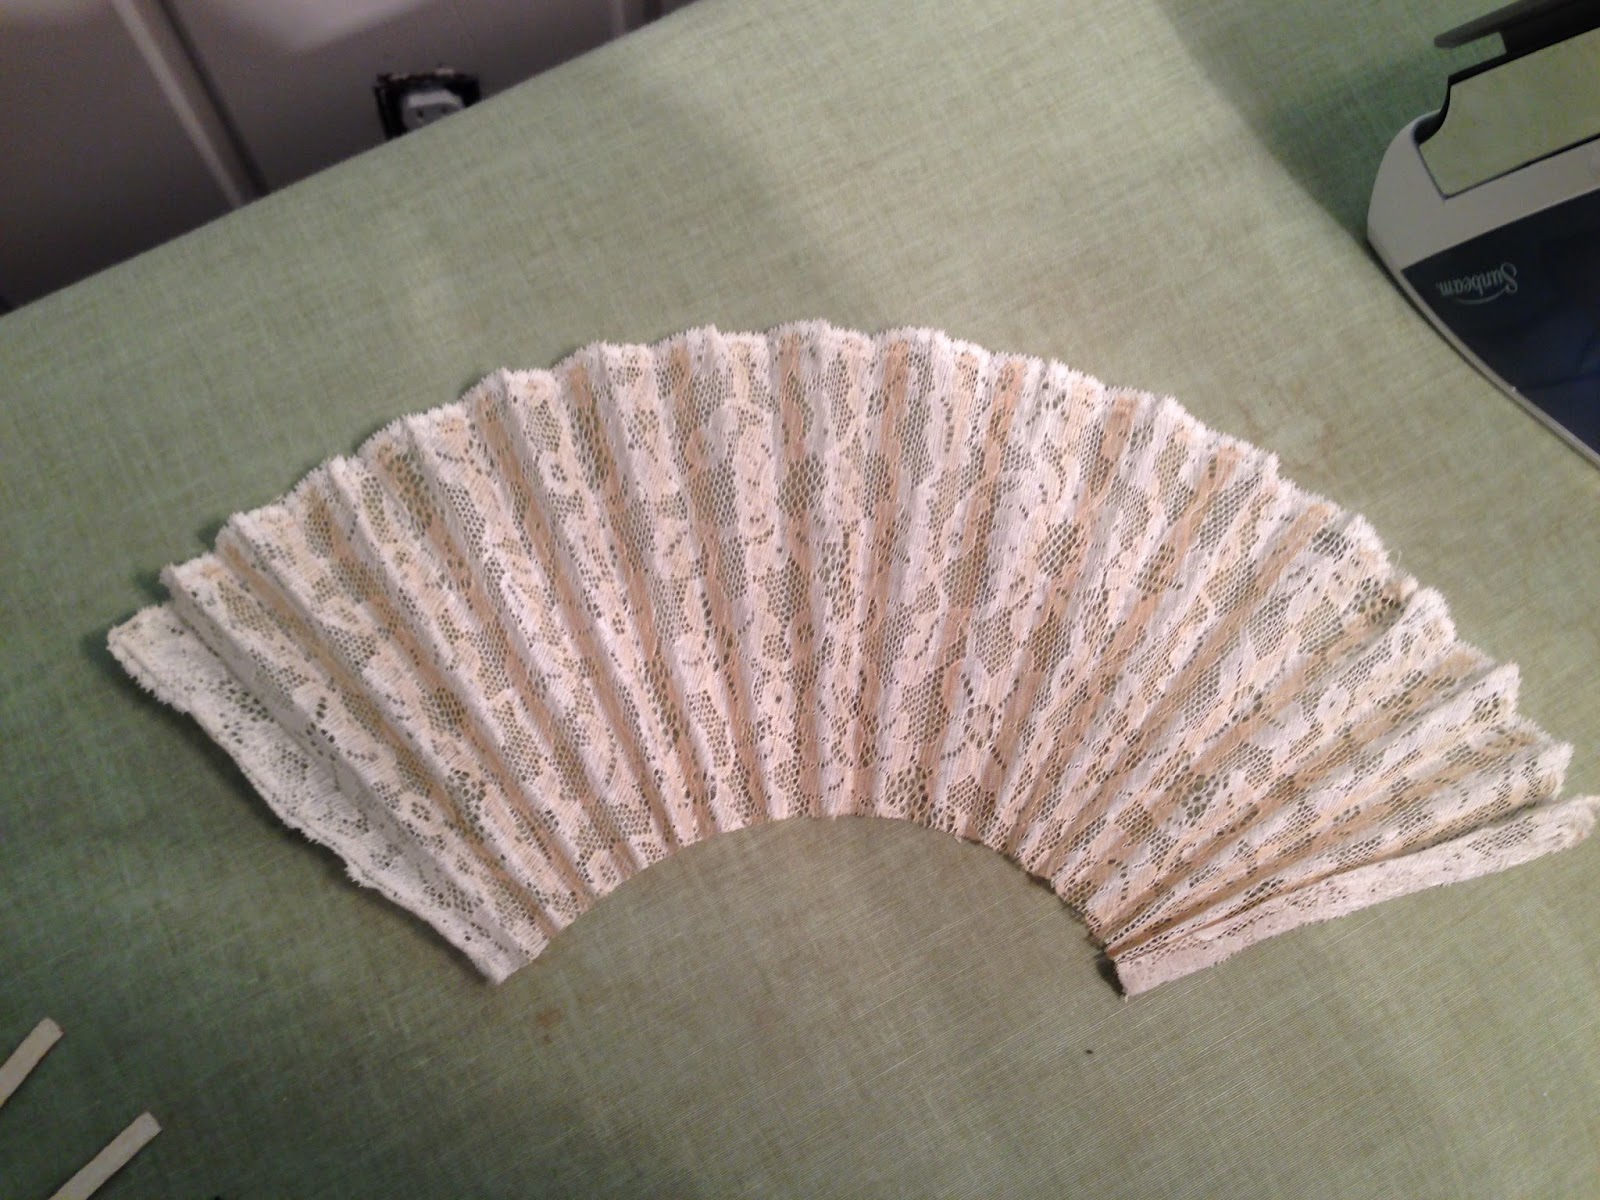
First, you'll need to very, very gently remove the original fabric. Basically I very gently pulled the lace from the fan, starting at the fan back (the fan back and front are thicker than the slats in between).
Gently continue this process until you have removed the old fabric from the fan back, front and slats in between (starting on one end and working your way to the other). Save the fabric that you removed - you will need this as a template for the fabric you are going to replace it with.
You may want to steam it a little bit, to loosen the glue, if it doesn't come off on its own, but you want to keep the fan back/front and the fan slats very well intact (no breaks), since that will become your new fan base. I was fortunate enough that my fan was old enough that the fan glue was not really holding well anymore, so some gentle tugging and the lace started to come right off.
 |
| Vintage fan - wooden slats with old lace removed |
 |
Vintage fan old lace after removal
First, I ironed the old lace flat, so that I could use for the 'pattern' for my new silk taffeta fan.
|
 |
Vintage fan old lace ironed flat - this is my 'pattern'
Then I used the ironed old lace as a pattern to trace and cut out my new silk fan from a piece of silk taffeta. Note: you can trace the shape and save the cutting for later, if you want to paint or decorate the fan fabric BEFORE gluing it to the fan slats. I wanted to see how to glue it together, and make sure it would go on well, so chose to glue it FIRST and then paint the silk fabric once it was already together. Next time I make one, I will likely paint the silk fabric first and LATER glue it to the fan slats when ready. |
 |
Cream silk taffeta fan from 'pattern' - Gem Tac glue at edges to keep from fraying
Following the advice of InTheLongRun's fan tutorial, I used Gem Tac glue along the edges of my silk taffeta (she has done it with cotton/cotton blends only) taking a chance that it would work with silk. It did, it actually worked nicely, so once that was dry-ish (and kind of tacky), I used the original lace back to trace out where the fan slats should be re-attached onto a new pattern. Then I made tiny marks along the edge of my silk taffeta fabric for the fan back, that show me where I should glue the fan slats.
|
 |
Top is new silk, right is old lace and left is fan slat pattern
From there I started gluing the silk taffeta to the wooden fan slats one at a time, using Gem Tac glue and wiping away the excess gently (it does darken and 'mark' the silk taffeta, so be aware!). I run a length of glue down a wood slat, then flipped the fan over to line up the fan slat to fit back with it's original neighbors (recall what you want it to look like fully opened - you don't want a lot of room between the slats, you want them to overlap each other slightly).
|
 |
Gluing the silk taffeta to the wood slats
I glued and glued and glued and wiped, and glued and wiped until it was all done - it looked quite nice, although the glue definitely darkens the silk taffeta and makes it slightly tacky/sticky.
|
 |
| Finished silk fan - ready to paint |
 |
Finished silk fan - back
And now the silk taffeta fan was ready for me to paint! I didn't prepare ahead of time, because I was planning only to do a basic silk fabric for my first one, but the darkened glue areas made me want to paint it for fun and to cover any flaws, so I grabbed my acrylics and went to down painting it!
 |
| Staring painting - silk fan |
|
 |
| Painting in progress - silk fan |
 |
Painting done - Silk fan by TheLadyDetalle
I painted this fan to compliment my late 1790's (1799) gown for the upcoming ball, and I like how it turned out for first try! Pictured below in front of the dress I intend to wear this with next weekend!
|
| Early 19th Century Painted Silk Wood fan by TheLadyDetalle |
|
 |
| Finished silk wood fan back by TheLadyDetalle |
I hope this mini fan tutorial was helpful!


No comments:
Post a Comment